Share this Stitch
Crochet 101 [Class 1]: The Slip Knot Videos
The slip knot is the first step for all crochet stitches.
How to Create a Slip Knot
The slip knot is the first step for all crochet stitches.
Step 1
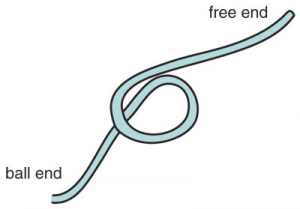
The Slip Knot Figure 1
Begin by making a slip knot on the crochet hook about 6 inches from the free end of the yarn. You will first start by creating a loop with the yarn. Be sure that the free end of the yarn is dangling behind your loop.
[ see The Slip Knot Figure 1 ]
Step 2

The Slip Knot Figure 2
Insert the crochet hook through the center of the loop and hook the free end.
[ see The Slip Knot Figure 2 ]
Step 3
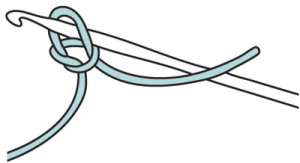
The Slip Knot Figure 3
Pull this through and up onto the working area of the crochet hook.
[ see The Slip Knot Figure 3 ]